
by Ziv Haparnas
Lightning photos are very dramatic. The contrast between the night darkness and the lightning brightness results in very powerful photos. In this article we will provide you with a few tips and guidelines for successfully taking lightning photos.
The first thing to do when preparing for lightning photography is to set the camera to manual mode. Since all the preparations are done in a dark environment the camera can not automatically set the right focus, exposure and aperture.
Set the focus to manual and focus the camera on infinity. This is the right setting since lightning photography is done from long distance. Set the exposure to anywhere between a few seconds to a few minutes. The right exposure depends on the type of lightning – some lightning last a friction of a second while others can last a few seconds – and the distance from the lightning storm. Usually you would guess what the right exposure is and after the first lightning shot you would have to review the photo and correct the exposure as needed.
Remember to turn the flash unit off. Flash is not needed in lightning photography but if left in automatic mode the camera might fire it anyway due to the dark scene. The aperture should be set to a small value since lightning are very bright and with a small aperture they will still be more than visible in the photo.
Now that the camera is set you will need to choose the right scene for the photo – this is also referred to as framing the photo. To make lightning photos more interesting try to find contrast or objects that will be interesting when lit or stroked by lightning. Such objects could be trees, city sky line, roads or antenna towers. After your first lightning shot you should review the photo and make any needed corrections to the photo frame.
You can also play with other settings of the camera to achieve different effects. For example you can take photos with different white balance settings to achieve different color temperatures.
Remember that it can take a very long time to take one good lightning photo. Since there is no advanced notice as to when lightning strikes you will need to take photos continuously as the lightning storm is active. Be patient and make sure you are comfortable. Keep yourself dry have plenty of food and coffee and prepare for a shooting session that can last hours. After doing all the preparations and framing your photo the only thing to do is wait. Some luck can always be of help in getting this one perfect lightning photo.
And last but not least make sure that you are safe. Lightning can be dangerous. Make sure that you are not too close or in the heart of the storm. Avoid having metal objects around you or tall sharp objects. Remember that lightning strikes the highest object that can conduct its electrical current to the ground.
In conclusion taking good lightning photos is not hard. It takes a lot of patience some know-how of camera settings and regardless of your photography level it also takes a lot of luck.
About the Author
Mr. Haparnas writes about practical technology issues. More information on digital photo printing and photography is available on printrates.com - a site about photo printing This article can be published and used as long as the resource box including the backlink is included. Ziv Haparnas is a technology veteran.
Disclamer:
The opinions expressed by authors in this blog are their own and in no way represent the opinions of the owner and or administrator of molophoto blog. Molophoto bears no responsibility for any opinion expressed by any contributing author and or article.
Friday, October 31, 2008
Thursday, October 30, 2008
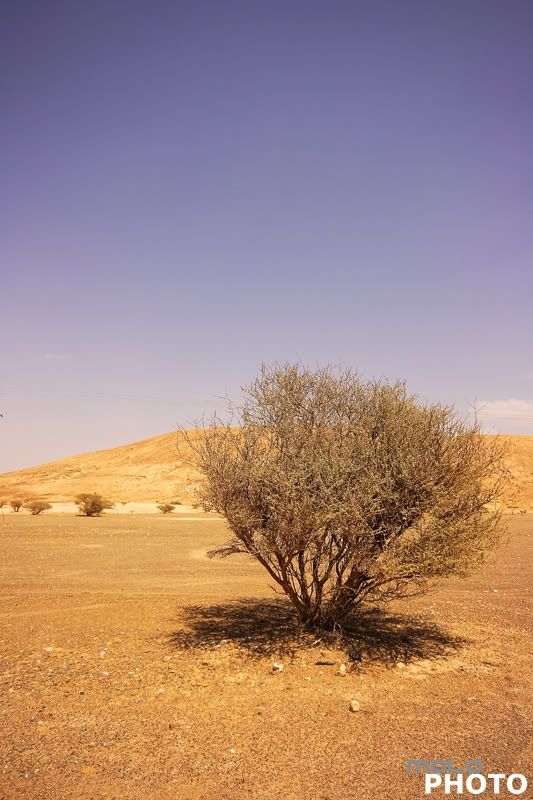
desert series 9 of 12
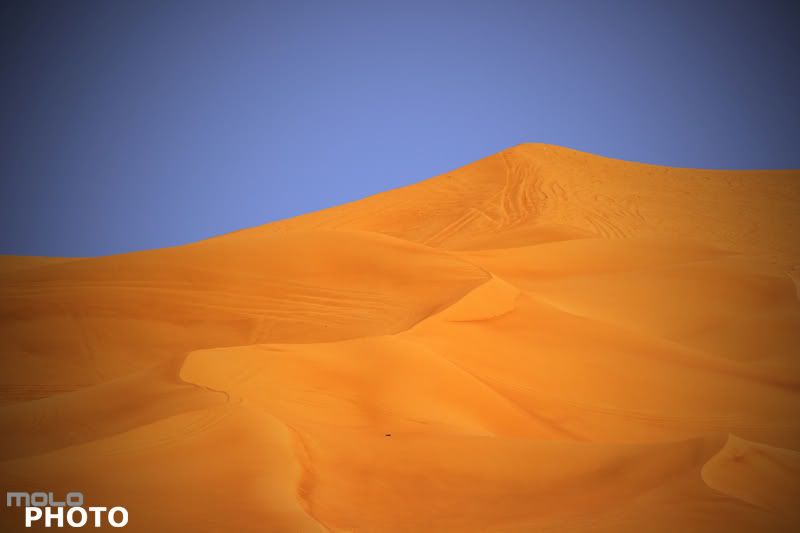
Exif
Camera Model: Canon 400D
Shutter Speed: 1/640 sec.
Lens Aperture: F/8
ISO: 100
Focal Length: 300mm
Exposure Program: Aperture Priority
Wednesday, October 29, 2008
Time lapse still digital photography technique
by Ziv Haparnas
Time lapse photography is a technique that allows to quickly and visually convey processes that take a long time in real life. For example time lapse photography can shrink to 10 seconds the complete process of building a new bridge. Although usually used in videos time lapse can also be used in still digital photography.
The idea behind time lapse is simple. You want to capture a change that usually takes a long time in real life. In order to accomplish that you take photos either every fixed period of time or every time there is some change in the real life process. For example you can take a photo once a week to document the building of a new bridge, or you can take a photo every time a new floor is built in a new skyscraper. When viewing these photos in sequence the feeling of the actual real life process and its magnitude is very effectively conveyed.
Time lapse photography is mostly known for such scenarios as the process of building bridges and buildings or the process of flowers growing. There are however other usages to time lapse photography that are more relevant to the amateur home photographer. Here are some examples:
^Moving apartments: You can document your moving to a new apartment using time lapse techniques. In this scenario it is best to take photos based on events and not every fixed period of time. For example start with a photo of the apartment you are moving from. Then as you start packing take a photo every time you pack a box. When the movers show up take photos as furniture are moved away from your apartment. Do the reverse in the new apartment. Take a photo of it being empty. Then start taking photos as furniture move in and finally take photos as each single box is opened and put in its new place. Taking the time to take such photos can be a great way to capture memories for years to come.
^Renovating your house: Similar to moving, renovation can be documented using time lapse techniques. Take photos as significant changes are made to your house. Take the first photo before any work is done. Then continue taking photos as renovation progresses, for example when a wall is taken down. Take the last photo when the renovation is completed and the house is ready.
^People and kids: You can use time lapse techniques to document how your kids are growing up or other changes in people you care about. One way to accomplish that is by taking a photo of your kids every 6 months or a year. It is a good idea to take the photos in the same place and in the same position as it will intensify the effect of the changes happened to them over that period of time.
^Your garden: If you are working on your garden, maybe planted a tree or some special flowers you can use time lapse techniques to document the progress of your work. Take a photo every fixed period of time, depending on the time it takes for the tree or plant to grow this can be a few days or a few weeks.
Professional photographers sometimes use special equipment that can automatically take photos every certain period of time. For most amateur usages manually taking the photos is good enough. Some things to care about when taking time lapse photos: try to take photos in the same time of the day and with the same lighting – this will intensify the effect as the difference between the photos will be mostly the changes that you care about and not other external factors like lighting that can draw unwanted attention.
About the Author
Ziv Haparnas is a veteran technologist. Mr. Haparnas writes about practical technology and science issues. This article can be reprinted and used as long as the resource box including the backlink is included. More information on digital photo printing and photography is available on printrates.com - a site about Philips and digital photo printing
Tuesday, October 28, 2008
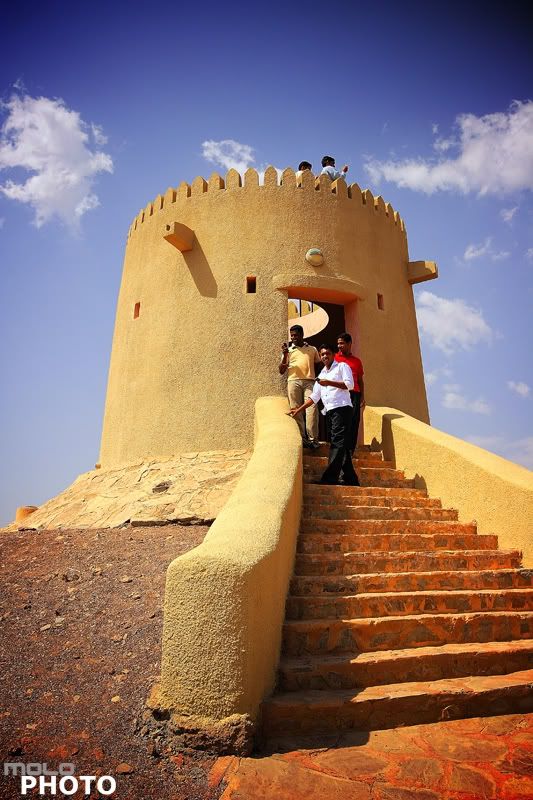
desert series 8 of 12
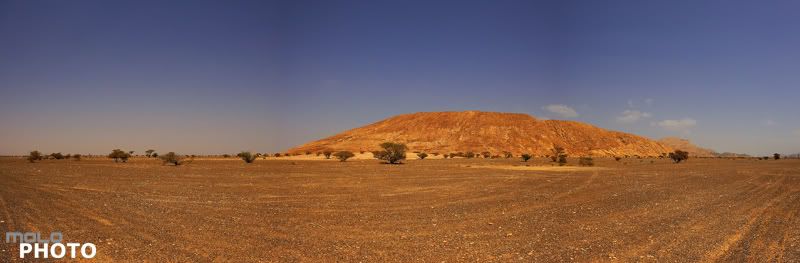
Exif
Camera Model: Canon 400D
Shutter Speed: 1/500 sec.
Lens Aperture: F/8
ISO: 100
Focal Length: 10mm
Exposure Program: Aperture Priority
Monday, October 27, 2008
The First Photograph
by Joseph Gill
The summer of 1826 was a turning point in recorded human history. After ten years of failed experimentation a man by the name of Joseph Nicephore Niépce created the first permanent surviving photograph. The first surviving photograph depicted was the view from Niépce's workshop at his estate in Gras, France. Though hard to decipher it contains several buildings a tree and a barn. Although poor in quality compared to even the earliest photographs its development was the foundation of what we know of as photography today.
Nicephore Niépce was born on March 7th 1765 to a wealthy family suspected of having royalist sympathies. His mother was the daughter of a well renown lawyer and his father the kings councilor. In his youth Niépce showed an incredible aptitude for the invention process but was preparing for a career in the church. Before the start of the French Revolution He left the church to become an officer in the army. Due to his royalist sympathies and his families past he left the military during the first period of the revolution. When Napoleon came to power He returned to the army. After serving in the Sardinian and Italian military campaigns. Shortly thereafter he retired from the army for health related reasons. After a few years of being a statesmen he returned home and dedicated his time to scientific experimentation and invention.
It was this aspect of Niépce's life that would forever change the way humanity saw the world and our history. In 1822 he created the first permanent image using a camera obscura, but it was in 1826 when he created the image that exists even today. To do this he used bitumen cutback attenuated in animal oil. He deposited this solution onto a plate made of glass, copper and tin-lead alloy and exposed it for several hours. As odd as it sounds the first equivalent photo paper was actually asphalt. Once the image on the plate became visible Niépce used an acid to process the picture. This acid dissolved the coating and left the exposed lines to show through. Once this process was completed an engraver used the exposed lines to chisel out the plate used for copying the image. With that heliography "of the Sun" was invented. This first image took 8 hours to expose and due to the movement of sun the building in the photograph had light coming from both directions. Though photographically speaking this first image is of poor quality it was the advent of modern photography.
The ability to transfer an image using light was the gift that was given to us. In the almost 200 years since that first photo was taken photography has become a mainstay in our everyday lives. Every newspaper you read, every family photograph you cherish, every piece of modern history transferred using nothing but light was founded on the inventive nature of humanity. Niépce is the embodiment of that creativity and though not well known to the masses he has affected our lives in ways that we should be eternally grateful for.
About the Author
If you would like more information about professional photo framing please visit: www.sportsframer.com
Joseph Gill
Disclamer:
The opinions expressed by authors in this blog are their own and in no way represent the opinions of the owner and or administrator of molophoto blog. Molophoto bears no responsibility for any opinion expressed by any contributing author and or article.
Sunday, October 26, 2008
desert seris 7 of 12
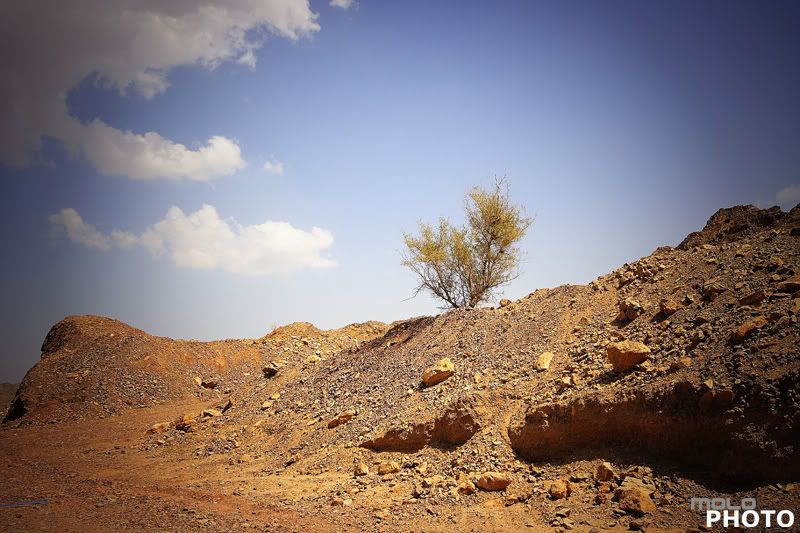
Exif
Camera Model: Canon 400D
Shutter Speed: 1/400 sec.
Lens Aperture: F/8
ISO: 100
Focal Length: 20mm
Exposure Program: Aperture Priority
Saturday, October 25, 2008
The advantages of digital photos and digital cameras
by Ziv Haparnas
There is no debate that digital cameras are going to take over the photography market and with time we will see less and less film cameras sold and used. It is beneficial to take a moment and try to list the advantages of digital cameras and digital photos and put some order in why everybody likes them so much. In this article you will find that list.
Digital photos and digital cameras have many advantages and allow many new usages that were not possible with film. Here are a few:
Low photo cost:
Photos taken with a digital camera literally cost nothing. The photos are kept in erasable memory and thus can always be discarded at no cost. Viewing the photos is immediate and does not cost anything (there is no film development cost). Also the photos you would like to keep can be copied to digital media such as a computer's hard disk. With storage prices going down the cost of saving a photo on disk is practically zero.
The capacity:
With ever growing storage capacities digital cameras today can hold hundreds and sometimes thousands of photos on a single media. You can always have a few more in your pocket and changing is very fast. The result is that a digital camera has practically infinite capacity. You can shoot as many photos as you want and at the end of the day just dump them on your computer's disk. There is no time lost changing film and there is no photo opportunities lost due to lack of film or reserving film for later.
The feedback:
One of the great advantages of digital cameras is instant feedback. Almost all digital cameras include a small LCD screen. Once a photo is shot you can go back and watch it on that screen. The ability to see how the photo looks like results in better photos. If the photo is not good you can take another one. Being able to see the photos on the spot results in an educated decision how to fix a photo or how to compose it better. It takes a lot of the guessing away from photography.
New shooting angles:
With digital cameras you can take photos without your eye glued to the viewfinder. Overhead shots where you raise the camera over your head are much easier since you can still see what the camera is shooting by just looking up at its LCD screen. You are not limited anymore to angles where you can look through the viewfinder; you can shoot from any angle that the LCD is visible from. You can always shoot blindly like photographers used to do with film cameras.
Correcting photos:
With digital cameras photos can be corrected using photo editing software. Some correction abilities are built-in the cameras but many more are available as software packages for your PC. Such corrections include red eye removal, contrast enhancements and more.
Changing conditions:
With digital cameras the settings of the sensor can be changed instantly for each photo taken. With a click of a button the camera can be put in an indoor or outdoor mode, low light, night photography etc. Some cameras will automatically sense the scenario and set the sensor mode accordingly. This is literally like changing a roll of film to the optimized one for every photo you shoot: the best ISO, color features and more.
The myth of quality:
While it is true that film photography has its advantages the claim for superior quality is no longer true. As digital camera evolved the quality of high end digital SLR cameras is superb and in many ways even better than film. When considering quality you should also consider the quality in terms of composition and the scenario caught in the photo. With digital cameras' high capacity, zero photo cost and instant adaptability to changing conditions photographers can produce better compositions and experiment more to get the best photo possible.
Longevity:
Digital photos never lose their quality. A digital photo will be identical today and in 500 years. As long as you refresh the digital media every now and then and back it up your photos will literally last forever with no quality degradation. Digital photos do not turn yellow, they do not fold or get torn.
About the Author
Find more on photo printing and photography is on printrates.com - a place about digital photo print service This article can be published only if the resource box including the backlink is included. Ziv Haparnas is an expert technology writer. Mr. Haparnas writes about practical technology issues.
Friday, October 24, 2008
desert series 6 of 12

Exif
Camera Model: Canon 400D
Shutter Speed: 1/640 sec.
Lens Aperture: F/8
ISO: 100
Focal Length: 10mm
Exposure Program: Aperture Priority
Thursday, October 23, 2008
Taking great digital photos of your home
by Ziv Haparnas
There are many reasons why you would like to photograph your home. No matter what the reason is there are a few simple tips you can follow in order to get better quality home photos that look like photos taken by professional photographers. This article lists few such tips.
The most common reason for taking photos of your home is when planning to sell it. With the proliferation of online real estate web sites having high quality photos of your home can help attracting potential buyers. In addition to selling your home there are many other reasons to photograph it. Examples of such reasons are when moving to a new home you can take photos as a memory for how the home looked like when you moved in. Another reason is for sending your home photos to your friends and family. Yet another reason to take photos of your home is to compare the condition of the home before and after doing some renovation work on it.
Regardless of why you are taking photos of your home you can improve those photos by simply following a few easy tips. The result will be better quality and more impressive photos of your home that look like photos taken by professional photographers. Here are a number of such tips:
^Lighting: Follow outdoor good photography lighting rules. Avoid taking photos of your home on a very bright day. Bright days result in photos that look overexposed. Bright days also result in photos that include more shadows and are less detailed. It is better to take photos of your home during early morning hours, late afternoon hours or when there is overcast.
^Composition: Homes are big objects and sometimes photographers tend to fill the photo with just the home. It is better to include other objects in your home photo in addition to the home itself. For example you can have a tree in the photo or the walkway to your home entrance. These objects will help the viewer visualize the size of your home and put it in some perspective.
^Photo angle: Your home photo will look more impressive if taken from a lower angle than usual. To help you find the perfect angle for your home photo simply take a few photos from different angles. Take the photos while you are standing, sitting or even lying on the floor. Later on you can choose the photo that looks the best.
^Focus on unique details: Most homes have some unique details. Such details can include for example special art work, curves, arches or other architectural elements. Take extra zoom photos of such details to emphasize their value to the viewer.
Do not forget the interior: Take photographs of the home interior too. When photographing the home interior avoid using flash as it distorts the natural colors and make photos look colder. Use a tripod and a longer exposure time if needed. If you must use flash (for example when shooting in a basement) use an external flash unit and point it to the ceiling to create a bounce flash effect.
About the Author
Mr. Haparnas writes about science and technology. Ziv Haparnas is a technology veteran. More information on digital photo printing and photography is available on printrates.com - a site about digital photo printing This article can be published only if the resource box including the backlink is included.
Wednesday, October 22, 2008
desert series 5 of 12
 Exif
ExifCamera Model: Canon 400D
Shutter Speed: 1/250 sec.
Lens Aperture: F/8
ISO: 100
Focal Length: 20mm
Exposure Program: Aperture Priority
Tuesday, October 21, 2008
Some macro digital photography basics
by Ziv Haparnas
Roberto Sedycias has a bachelor degree in Business Administration and over 20 years experience in systems analysis and computer programmer. Currently working as IT consultant/chief software engineer for www.polomercantil.com.br.Macro photography is underused by many amateur photographers. Professional photographer use macro photography to take extremely high quality macro photos that impress their viewers. Here are some facts about such macro digital photos.
We have all seen macro digital photos even if some of us did not realize that they were such. The two most common macro digital photos objects are flowers and insects. But macro photography is not limited to these objects. Creative photographers take macro photos of objects that you would never think of – and create astonishing digital photos. For example taking a macro photo of a simple screw that is half way screwed in a piece of wood can be an amazing digital photo if taken using the right techniques of lighting and macro photography.
So what is macro photography? There are many definitions that can be used. The most intuitive one is simple: digital photos that are taken from very close to the objects. Another definition is digital photos that present objects in real life sizes when printed on a 4X6 paper. Yet another definition extends this to a real life size (1:1 ratio) or better (i.e. bigger than in real life).
Professional photographers use special equipment that was designed specifically for macro photography. Special lenses, lens tube extenders, flash units such as ring flashes and more are used. There is no doubt that such equipment can help specially in scenes that are hard to photograph. But even the cheapest digital pocket camera is capable of pretty good macro photography if only used right by the photographer.
Practically all digital cameras can be put in a "macro mode". Usually this mode is illustrated as a "flower icon" (probably because flowers are the most common object for macro photography). When you put the camera in a macro mode – the camera optimizes its settings for the best macro digital photo. If your camera allows manual control of some of its settings (like aperture and focus) you can improve the quality of the photos further more.
In macro mode the digital camera will set a wider aperture in order to achieve a narrower depth of field. This helps create a macro photo that is focused on a very close item with its background blurry. The camera will also optimize its focusing algorithms to focusing on a very close object. In fact in macro mode it will be hard to make the camera focus on objects in normal or infinite distances.
Some cameras also set the flash intensity to lower since the object is close less flash light energy is needed to light up the scene. Macro photography lighting is a complicated issue due to the close proximity of the object to the lens. A right angle, source and intensity of the flash are hard to achieve. For that reason it is always better to take macro digital photos in a highly lit environment like in daylight.
In conclusion – like most other photography techniques it is important to use macro photography in the right scenarios. It also takes a lot of practice to achieve high quality macro digital photos. For example if you want to get a macro photo of a bee on a flower – you need to learn how to lock the camera focus – press the shutter button half way while all the settings are set and wait for that bee to show up. Also take as many photos as you can so hopefully one of them will be the perfect one you were aiming at. Go out and start taking macro photos to practice your skills. It is a good idea not to limit yourself to flowers and insects, anything can be a good object, a nail, a screw or a piece of candy.
About the Author
Ziv Haparnas is a technology expoert. More information on digital photo printing and photography is available on printrates.com - a site about photo printing This article can be published and used as long as the resource box including the backlink is included.
Disclamer:
The opinions expressed by authors in this blog are their own and in no way represent the opinions of the owner and or administrator of molophoto blog. Molophoto bears no responsibility for any opinion expressed by any contributing author and or article.
Monday, October 20, 2008
desert series 4 of 12
 Exif
ExifCamera Model: Canon 400D
Shutter Speed: 1/400 sec.
Lens Aperture: F/8
ISO: 100
Focal Length: 20mm
Exposure Program: Aperture Priority
Sunday, October 19, 2008
Smart usage can extend digital cameras battery life
by Ziv Haparnas
Digital cameras are powered by batteries and are limited in the number of digital photos that can be taken between either replacing or recharging the batteries. If you are planning for a long digital photo shooting session or are traveling learning some habits that can save on power will help you conserve energy and squeeze more digital photos from your batteries.
Digital cameras have many features and options. Some features consume more energy than others. Some of the greatest features are power hungry. Learning which those power hungry features are and using them with caution can help you get more digital photos from your camera battery.
Digital camera LCD screen:
The digital camera LCD screen is one of the biggest energy consumers. Digital cameras provide viewing of digital photos on a small LCD screen. You can also shoot digital photos using the LCD instead of the viewfinder. An LCD screen consumes a lot of energy. This is the reason why all digital cameras turn off the LCD screen after a certain amount of no usage time. In order to conserve energy try the following: Turn off the LCD and use the viewfinder whenever possible. Only use the LCD when you must for example when taking an overhead digital photo when the optical viewfinder is not usable. Minimize digital photo viewing. When you view photos on the LCD you are wasting energy. Only use the LCD to view photos when you need to do so for the benefit of the next digital photos shooting � for example to check if a composition was right or if the lighting was good.
Digital camera mechanical motors:
The motors that move the mechanical components of the digital camera such as the lenses when focusing or zooming are also a big power consumer. Motors consume a lot of energy when moving the digital camera optical components. In order to minimize the motors movement try the following: Do not use continuous focus when not necessary: The motors that move the optical components in order to focus consume energy. You can not avoid focusing but you can avoid focusing that is not necessary. For moving objects such as in sport events continuous focus is used so your can stay focused on the object until you are ready to take the photo. In those cases as long as you press the shutter button half way down the camera will continue to focusing on the object. To save energy minimize that time to the minimum necessary.
Digital camera flash:
The digital camera flash unit is also a big power consumer. Shooting photos using the flash consumes more energy than shooting photos without flash. You can not avoid flash photography when it is needed but in many cases you will find yourself shooting digital photos in situations where the flash is not needed but it is fired because it was left in automatic mode and the camera fired it for no reason. When possible set the flash to manual mode and control its usage.
False shutter button usage:
Every time you press the shutter button half way down and do not take a photo you waste energy. When pressing the shutter button half way down the camera goes through a series of processes getting ready to shoot a digital photo. It focuses the lenses it wakes up electronic components and gets the flash ready if needed. Avoid pressing the shutter half way down when you do not plan to shoot a photo.
In conclusion until there is a breakthrough in battery technology you will have to keep in mind power consumption when going on long shooting sessions without being able to change or recharge the batteries. Fortunately you can follow the few simple usage tips given in this article to significantly extend your digital camera battery life.
About the Author
More information on digital photo printing and photography is available on printrates.com - a site about photo printing This article can be published only if the resource box including the backlink is included. Ziv Haparnas writes about science and technology. Ziv Haparnas is a technology expert.
Disclamer:
The opinions expressed by authors in this blog are their own and in no way represent the opinions of the owner and or administrator of molophoto blog. Molophoto bears no responsibility for any opinion expressed by any contributing author and or article.
Saturday, October 18, 2008
desert serie 3 of 12
Exif
Camera Model: Canon 400D
Shutter Speed: 1/400 sec.
Lens Aperture: F/8
ISO: 100
Focal Length: 13mm
Exposure Program: Aperture Priority
Friday, October 17, 2008
Sensor size and Depth of field in film and digital cameras
by Ziv Haparnas
Depth of field is defined as the range in which the photo is in focus. Achieving a specific depth of field is a useful photography technique used for example to achieve a blurry background effect. Film and digital cameras have different optical attributes as a result of using different sensor sizes. For that reason depth of field is also different in film and digital cameras.
Before you can understand the difference between film and digital cameras when it comes to depth of field, it is important to understand what depth of field is and how it can be set by the photographer. Depth of field (also known as DOF for short) is defined as the range in which the photo is in focus. For example: an infinite depth of field means that the photo will be in focus from a certain distance from the camera and up to infinity. Another example: when taking a blurry photo the goal is to set the depth of field just around the object, which results in the object being in focus while the background behind it is not.
The depth of field is influenced by the optical parameters of the camera and the specific scene. The main parameters that influence the depth of field are:
The distance of the object from the camera influences the possible depth of field settings. For example shooting an object that is very close to the camera will result in a smaller depth of field. On the other an extreme case when the object is in practical infinite distance from the camera will result in the camera focused on infinity and the depth of field being infinite too.
The aperture: The depth of field increases as the f number increases. The wider the aperture (f number decreases) the smaller the depth of field and vice versa: the narrower the aperture (f number increases) the greater the depth of field.
The focal length of the lens: The depth of field grows as the focal length gets shorter. For example if you use normal lenses at somewhere around 50mm your depth of field will be much greater than if you use zoom lenses at 200mm. With a very long focal length the depth of field can be extremely small.
One of the main differences between film and digital cameras is the sensor used to capture the photo. Film cameras use a film sensitive to light that is placed behind the lens. When a photo is taken the shutter opens for a predetermined period of time and light hits the film. The result is a photo "printed" on the film. Digital cameras on the other hand use a fixed electronic sensor (also known as CCD) that is situated behind the lens. The sensor is built from tiny light sensitive sensors each representing a pixel. When the shutter opens light hits the sensor and each pixel gets its "value". Put together all the pixels comprise one digital photo.
A normal single frame of film size was standardized at 35mm. Digital cameras on the other hand use smaller sensors. One of the reasons why digital sensors are smaller is cost – manufacturing a large electronic sensor is costly (for reasons such as yield and other specific process limitations). The depth of field changes with the sensor size, the smaller the sensor the higher the depth of field. In fact low end pocket cameras use small sensors that together with their other optical limitations result in depth of field that is practically infinite. Because photographers used to measure everything based on 35mm film – many digital cameras still quote "35mm equivalent" measurement. There are a few high end SLR digital cameras that use 35mm sensors thus providing the same optical characteristics as the old film cameras. These are still expensive and considered high end professional cameras.
About the Author
Ziv Haparnas writes about practical technology and science issues. Information about photography and photo prints is on printrates.com - your home for Philips and digital photo printing This article can be published only if the resource box including the backlink is included.
Disclamer:
The opinions expressed by authors in this blog are their own and in no way represent the opinions of the owner and or administrator of molophoto blog. Molophoto bears no responsibility for any opinion expressed by any contributing author and or article.
Thursday, October 16, 2008
desert series 2 of 12

Exif
Camera Model: Canon 400D
Shutter Speed: 1/400 sec.
Lens Aperture: F/8
ISO: 100
Focal Length: 20mm
Exposure Program: Aperture Priority
Wednesday, October 15, 2008
Professionals take many digital photos to get that perfect one
by Ziv Haparnas
Professional photographers take a large number of photos. They know that by doing so they will most likely find that perfect one they were aiming for. Digital cameras make such a technique available to all of us.
It should be pretty intuitive that the more photos you take the more likely you are to take that perfect one – the perfect angle, lighting and composition. During the film camera era it was an expensive proposition that was used by professionals only. Digital cameras however make it affordable and reachable to all of us.
Forget the slogan "save on film". Photos taken with film cameras are expensive. Each photo consumes a frame in a roll of film. Film rolls capacity is relatively low usually 24 or 36 photos. Every photo also needs to be developed and printed. For these reasons when using film cameras we got used to saving film. You only take a photo when the moment is right and you are pretty sure that the results will be good. There is not much room for mistakes and experiments. On the other hand photos taken with digital cameras cost literally nothing. They are stored on erasable memory and thus can always be discarded at no cost. Moreover the photos can be viewed on digital screens and archived on digital media. When taking photos the digital camera uses digital memory to store the photos. Memory prices get lower and lower and capacity higher – it is very common today for digital cameras to have enough storage space for hundreds or even thousands of photos.
You should forget the habit of saving film when using digital cameras. It is still a good idea to follow good photography rules for composition and lighting but you should be free to take as many photos as you like, experiment with different settings and scenes and don't think twice before taking a photo. It is better to take one extra photo and delete it later on rather than regret not taking it. You will be surprised of the great quality of some of the photos that you thought would not be that good and that if using a film camera you would have never taken. And you will be surprised finding new angles and compositions that otherwise you would have never tried.
Digital cameras allow you to experiment with new angles and to take photos that were very hard to take with film cameras. For example taking overhead photos in an event or taking a photo from a floor angle were hard or even impossible for amateur photographers with limited resources. It is almost impossible to look through the viewfinder in such scenarios and check the composition. Moreover many times you do not have much time to take the photo before the opportunity is gone. With digital cameras you can easily take such photos. Just aim the camera and press the shutter. Move the camera a bit to the left or to the right, up and down and take more photos in different angles and zooms. Later on you can go over and choose a few photos that are good. Most of the photos will be bad – wrong angle, bad composition, objects not in the frame. These photos can be simply deleted at no additional cost. There was no harm in taking them and there was great value in finding the one good photo among all those bad ones.
In conclusion digital cameras are not just a digital replacement of old film cameras. They provide new features and new capabilities that can change the way you take photos. One of those is the ability to take a large number of photos. Take advantage of the high photo capacity and the practically free price tag of taking photos. You should always follow good composition and photography rules but also remember to experiment with new settings and angles. Take many photos and then choose the ones that you like the best.
About the Author
This article can be reprinted and used as long as the resource box including the backlink is included. Mr. Haparnas writes about practical technology and science issues. You can find more information on digital photo printing and photography in general on printrates.com - a site dedicated to Canon and photo printing Ziv Haparnas is a technology expert.
Disclamer:
The opinions expressed by authors in this blog are their own and in no way represent the opinions of the owner and or administrator of molophoto blog. Molophoto bears no responsibility for any opinion expressed by any contributing author and or article.
Tuesday, October 14, 2008
desert series 1 of 12
Exif
Camera Model: Canon 400D
Shutter Speed: 1/320 sec.
Lens Aperture: F/8
ISO: 100
Focal Length: 20mm
Exposure Program: Aperture Priority
Monday, October 13, 2008
Printing Your Photos at Home - Useful Tips and Hints for Best Quality
by Ziv Haparnas
Digital photography revolutionized the way in which we take, view and share photos and also the way in which we print them. Many digital photos never get printed but there are still many of us who prefer tangible paper prints. Photos can be printed using a professional service (in-store or online) or at home. In this article we will give you tips for getting quality prints at home.
A few years ago getting high quality prints at home was an expensive task that was only suitable for semi-professionals who could afford it and who had the know-how. Today low cost printers can generate amazing quality prints and sophisticated software can do most of the processing work behind the scenes. The result is that even amateur photographers can generate very high quality prints by pressing a single Print button.
There are a few simple tips to follow that can help in getting higher quality prints:
Edit your photos: make sure that you print exactly the photo that you want printed. Using simple photo editing tools (such as Photoshop or even Windows built-in Paint application) you can crop a photo to include just the area you are interested in or crop out parts which you do not want in the print. For example you took a photo of a group of friends but on the left corner of the photo there is a bystander that just happened to be there. You can crop the photo to include only your friends and thus effectively eliminate the unwanted object from the print.
When cropping photos always remember aspect-ratio – depending on the paper and the printer you're using sometimes you're limited to a certain photo size. For example if you print on a special 4X6 photo paper any source photo that is not in a 4X6 aspect ratio will have to be either stretched, cropped or parts of the print will be left blank. Make sure that you crop your photo to fit a specific aspect ratio if you're printing on a specific aspect-ratio paper.
More photo processing can be done in order to enhance your prints. It can include red-eye removal (many software packages will do it for you automatically) contrast enhancement and more. For example if a portion of the photo that is important to you is a bit dark – you can "stretch" the color palette in a way that this section will look more lit and detailed. This will usually be on the expense of "overexposing" other portions of the photo that you care less about.
Always remember photo resolution: Every photo is built out of pixels. The more pixels in a photo the higher the photo resolution is. We will not get into details here about the correlation between mega pixels and print quality but a general rule of thumb is that to get good print quality you need 300 pixels per inch or more. This means for example that the biggest paper size a 2 mega pixels photo can be printed on is 4X6 while an 8 mega pixels photo can be printed on an 8X10.
Pick the right printer and paper: there are many different printing each with its advantages and disadvantages. They range in quality and cost. To get the best print quality you should use photo paper in conjunction with a printer that supports such paper. Photo paper and photo printers are more expensive than document oriented A4 Inkjet printers. Choose the printer by evaluating how many prints you will make and how important quality is to you. If you print occasionally for fun an Inkjet printer with normal or photo paper is probably good enough for you. If you print a lot and quality is very important photo paper with a photo printer is the way to go. As a rule of thumb glossy photo paper provides the best quality for color photo prints while matte photo paper provides the best quality for black and white prints.
Printer ink and maintenance: printers need to be setup and maintained. It is extremely important to follow the instructions and to use compatible ink cartridges. High quality compatible ink can make the difference between low and high quality prints. It is usually recommended to buy ink from the same brand as the printer. Some calibration is usually needed when replacing ink and sometimes every few months of use. Follow the instructions for such procedures carefully as a calibrated printer results in much better quality prints than a printer that is not aligned and is poorly maintained.
In conclusion it is very easy to print your photos at home. Just buying a mid-range printer and hitting the "Print" button in your photo viewing software will probably result in good prints that are satisfactory for most consumers. Following some simple tips can enhance those prints to professional quality. As technology advances and prices go down experimenting at home with various photo processing tools, paper sizes, paper types and inks becomes affordable and is probably the best way to find what combination yields the best print quality for you.
About the Author
Mr. Haparnas writes about practical technology issues. Ziv Haparnas is a veteran technologist. This article can be published as long as the resource box including the backlink is included. More information on digital photo printing and photography is available on printrates.com - a site about digital prints
Sunday, October 12, 2008
flower from the park

Exif
Camera Model: Canon 400D
Shutter Speed: 1/50 sec.
Lens Aperture: F/5.6
ISO: 100
Focal Length: 55mm
Exposure Program: Aperture Priority
Saturday, October 11, 2008
Photos that capture moving objects motion
by Ziv Haparnas
Still photography freezes a scene. A photo is still in nature but sometimes you would like to convey a feeling of motion to the viewer. For example when taking a photo of a moving car or a runner. There are techniques that can help you achieve that - here is how.
You have probably experienced shooting blurry photos usually as a result of wrong camera settings or the object moving while you were taking the photo. Such blurriness is not something you would like to see in a photo but if controlled some blurriness can actually be used to capture and convey the feeling of motion in a still photo.
Shutter speed is what determines if a photo is frozen or blurry. The faster the shutter the more frozen the photo is. The slower the shutter the more motion is captured in the photo in the form of blurriness. Open the shutter for too long and the photo will be completely blurred.
There are two ways to capture motion: to blur the moving object while keeping the background in focus or to blur the background while keeping the object in focus:
Blurring the object:
Blurring a moving object captures its motion. For example consider a car driving down the road. If you freeze such a scene with high shutter speed the viewer can not tell if the car is moving or if it is parked. However if you use a slower shutter speed the moving car is blurred and the feeling of motion conveyed.
Blurring the background (panning):
Consider the same car from the above example. Another way to convey its motion is by blurring the background while keeping the car in focus. This is much harder to accomplish. The concept is simple: set the camera to a slower shutter speed. Pan the camera in a way that it follows the car. The car stays still at the same spot in the photo. Then shoot the photo as you continue panning the camera to keep it aligned with the moving car. The result is a car that is in focus while the background is blurred.
What is the right shutter speed needed to capture motion? Unfortunately there is no magic number. The shutter speed depends on many factors such as the speed of the object, its distance and the amount of motion (or blurriness) that you would like to capture. As a rule of thumb shutter speeds faster than 1/250 of a second tend to freeze the scene while shutter speeds slower than 1/50 of a second tend to result in some blurriness. If the object is very slow you might need to keep the shutter open for even a second or more. If the object is very fast 1/50 of a second can be all that you need.
It is very important to keep the camera steady when taking photos using slower shutter speeds. Usually when capturing motion in such a way you would need to stabilize the camera using a tripod or by putting the camera on a steady surface. The exception is when trying to blur the background of a moving object - since you need to pan the camera to keep it aligned with the object the camera inherently needs to move. The movement needs to be in the same speed and direction as the object and only in that direction. Sometimes such panning can be done using a tripod that allows control movement of the camera.
Photos that capture motion are impressive. The only way to learn how to shoot such photos is by experimenting. Start with experimenting blurring the moving object. This technique is relatively easy and within a short time you will master it. Once you do try to experiment with blurring the background. This is much harder to achieve and can be frustrating at the beginning.
About the Author
Information about photography and photo prints is on printrates.com - your home for photo prints Ziv Haparnas is a technology veteran. This article can be reprinted and used as long as the resource box including the backlink is included. Ziv Haparnas writes about practical technology issues.
Disclamer:
The opinions expressed by authors in this blog are their own and in no way represent the opinions of the owner and or administrator of molophoto blog. Molophoto bears no responsibility for any opinion expressed by any contributing author and or article.
Friday, October 10, 2008
red car 2

Exif
Camera Model: Canon 400D
Shutter Speed: 1/13 sec.
Lens Aperture: F/3.5
ISO: 400
Focal Length: 18mm
Exposure Program: Manual
Thursday, October 9, 2008
Photography – An Art of Wisdom
by Andrew Chan
Photography is a complex art which needs a lot of attention, and skills of thinking beyond the limits of normal human being. You need to put the best efforts into photography to come up with the best results. One can be a master of this art only after lots of practice and learning, but these two things are not enough to be a perfect photographer, you need to have passion for photography and to view the world behind the lens.
Photography is one of the most fascinated professions for youngsters these days. Wildlife photography, nature photography, food photography, fashion photography and wedding and bridal photography are the most popular mode of photography.
All the modes of photography have its own set of importance, but Wedding photography and bridal photography are more attached to the whole life of two human beings and their families. So, it's a kind of more important and special. As wedding is one time affair for people, they want to store all the memories of their wedding to remember and cherish for the whole life. Bride and groom both want to store every single moment spend during the wedding celebration in form of photographs or videos. So, they look for an expert photographer with enough experience to handle all the task of wedding photography efficiently.
An expert wedding photographer is not a general photographer. He generally has experience of capturing thousands of snaps in hundreds of weddings in diverse set of customs and photography scenario. The work of an expert wedding photographer is to extract the best look out of bride and groom along with the best moments in best possible capturing angles. There is no place for anything less than the best in wedding and bridal photography. In bridal photography it's more important because a photographer has to display all the hesitation, excitement, glaze and anxiety of a girl who is going to marry. It's very tough to reflect all those true feelings, but an expert photographer knows how to do that.
Thus wedding and bridal photography is really different than other modes of photography, because here you don't have independence of experimenting much, you have to experiment to a certain level, and the priority goes to the demand of bride and groom. This is a completely professional affair, and the photographer has to be professionally experienced to deliver the best service.
About the Author
1stJournal is a group of professional wedding photographers in Singapore, Hong Kong and Australia. For more information about their services, please visit: http://www.1stjournal.com
Wednesday, October 8, 2008
red car 1
Exif
Camera Model: Canon 400D
Shutter Speed: 1/13 sec.
Lens Aperture: F/3.5
ISO: 400
Focal Length: 18mm
Exposure Program: Manual
Tuesday, October 7, 2008
Orientation sensors in digital cameras
by Ziv Haparnas
Cameras can be held in two positions: horizontal or vertical (also knows as landscape and portrait). Photos taken in the vertical position are later on rotated 90 degrees (either clockwise or counter clockwise). Rotating the photos can be automated if your camera sports an orientation sensor.
If you just take a few photos every now and then rotating them manually is not a big deal. Usually after downloading the photos to your computer you will browse through them and when viewing a photo that needs to be rotated you will fix it using your software rotate feature. However when taking hundreds or thousands of photos this process can become tedious and long. The good news is that this process can be automated if the camera you are using includes an orientation sensor.
An orientation sensor is an electronic device built into the camera that can sense if the camera is held horizontally or vertically and if the camera is flipped or not (there are two vertical positions also known as 90 degrees or 270 degrees relative to the horizontal position). We will not get into the details of how this sensor works (there are a few options utilizing some physical feature such as gravitation or magnetic fields).
When taking a photo the camera saves the orientation sensor reading as EXIT data included in the photo file. EXIF stands for Exchangeable Image File Format and it defines a set of tags and semantics that can be added to existing formats such as JPG and TIFF to provide more information about the photo. One such piece of information is the camera orientation.
Software can later on use the EXIF orientation data to automatically rotate photos as needed. There are some options for how you can utilize this orientation data for your benefits, here are a few:
Camera built-in rotation software: Some cameras include an automatic mode in which the camera rotates the photo based on the orientation reading immediately after the photo was taken using build-in rotation software. Using this mode the photos saved on the camera memory are already rotated in the right direction and no further processing is needed.
Photo download software rotation: Some software can automatically rotate photos as they are downloaded from the digital camera to the computer hard disk. Before saving a photo to the hard disk the software checks its orientation and rotates it as needed.
Batch photo processing: Software that perform batch operations on photos. Usually such software can do many common photo processing operations such as contrast enhancements, re-sampling, red eye removal and more. They can also rotate photos based on the EXIF orientation data.
Photo viewers: Some photo viewers can utilize the EXIF orientation data when displaying photos. As opposed to the other solutions in this case the photo file is never changed instead every time a photo is displayed on the computer screen the displayed image is rotated as needed based the photo EXIF orientation data. Some professionals prefer this method as it solves the need to rotate photos in order to view them while it does not change the original file. Rotating a photo can degrade its quality if not done properly and thus leaving the original file as-is and only rotating the viewed image is a good way to guarantee no quality loss.
Orientation sensors are a nice addition to the ease of digital photography. If you plan to take many photos and you want to save time by automatically fixing their orientation when downloading them to your computer check if your camera includes an orientation sensor and if it does not make sure that your next camera does include one. Today such sensors are usually included in more expensive cameras as orientation sensors have not become a standard feature in all digital cameras – at least not yet
About the Author
This article can be published only if the resource box including the backlink is included. You can find more information on digital photo printing printing and photography in general on printrates.com - a site dedicated to digital photo printing Mr. Haparnas writes about practical technology and science issues. Ziv Haparnas is an expert in technology.
Disclamer:
The opinions expressed by authors in this blog are their own and in no way represent the opinions of the owner and or administrator of molophoto blog. Molophoto bears no responsibility for any opinion expressed by any contributing author and or article.
Monday, October 6, 2008
coco not
Exif
Camera Model: Canon 400D
Shutter Speed: 1/4 sec.
Lens Aperture: F/3.5
ISO: 400
Focal Length: 18mm
Exposure Program: Manual
Sunday, October 5, 2008
Old Fashioned High Resolution Photo Camera
by Roberto Sedycias
Tired of trying to keep updated with the highest mega pixel resolution digital camera? Well even if one has tried to do that, most certainly he will soon find out that his few months old digital camera is outdated in terms of mega pixel resolution. It's an ever changing kind of product that has become very hard to keep updated, unless one is willing to spend more money by making purchases every six to twelve months.
If the main intention of purchasing a photo camera is enlarging the image, then mega pixel resolution indeed will become the main factor. In this case one might consider a different option, which will keep his product updated for years to come. I'm talking about a used 4x5" film photo camera, together with a high resolution flat bed film scanner. All of this for less than one thousand US dollars. With all of this, one will get over 100 mega pixels in fine detailed film resolution and fine scanned digital images that can be enlarged up to 30x40" in size with professional quality. These 4x5" film cameras have done a remarkable job in general personal and commercial photography such as wedding, portraiture, product, documentary, advertising and landscape for nearly a hundred years.
Where to find 4x5" used film cameras? Since some of these cameras were mostly used in the past, until the 1960's, it should be no problem in finding them in American auction web sites. Anyway, a good used 4x5" camera with lens can be found for less than four hundred US dollars.
As for the flat bed film scanner, one can find brand new ones for less than five hundred US dollars. Just make sure the scanner is able to scan films.
Whenever purchasing a 4x5" film camera, one should look for the following features: folds into a compact box, flexible bellows, lenses that can be easily interchanged, accepts sheet film, ground glass focusing screen, easily handheld and optical viewfinder accessory.
As for the lenses, there are four main categories: 1 - general purposes; 2 - wide field (mostly used for close up work and landscape); 3 – extreme wide angles lenses; 4 – special effects lenses (telephoto). However, one might use a general purpose 127 or 152mm lens for most of his photograph sessions. In cases where it requires special lenses, such as architecture or macro photography, one will still find lots of them available in auction sites. Used lenses for 4x5" cameras made after world word II have excellent performances comparable to today's modern lenses.
Whenever making a purchase of a 4x5" camera make sure that: 1 - the bellows have no light leaks, 2 – the lens shutter works accurate at all speeds; 4 – the lens elements have no fungus and scratches of any kind; 4 – the focus is working properly between the ground glass and the film.
The option of using a 4x5" film camera, together with a flat bed film scanner, for enlarging images with professional quality is viable and accessible. Cheaper than top digital cameras, the 4x5" film camera offers better image quality and will always be updated in the future, maintaining its original value.
For those who wishes the very most detailed image enlargement, one can always use the 8x10" film camera. Four times the physical film size of the 4x5", this option offers so much film resolution that it is considered by many as the ultimate step for photo image enlargement.
Sometimes analog products deliver better results that its digital counterparts. If you are doing the job of enlarging photo images, you should give it a try with a 4x5" camera. You might just surprise yourself.
About the Author
This article can also be accessed in portuguese language from the News Articles section of page PolomerCantil. Roberto Sedycias has a bachelor degree in Business Administration and over 20 years experience in systems analysis and computer programming. Currently working as IT consultant for www.PoloMercantil.com.br.
Disclamer:
The opinions expressed by authors in this blog are their own and in no way represent the opinions of the owner and or administrator of molophoto blog. Molophoto bears no responsibility for any opinion expressed by any contributing author and or article.
Saturday, October 4, 2008
dhow cruise series 2 of 2
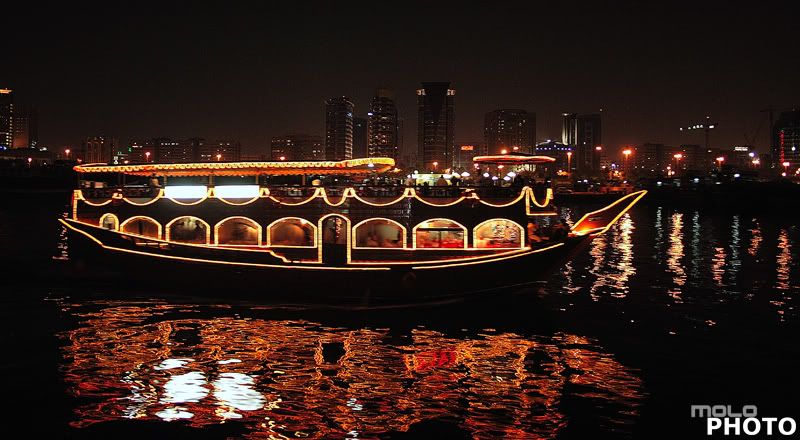 Exif
ExifCamera Model: Canon 400D
Shutter Speed: 1/3 sec.
Lens Aperture: F/3.5
ISO: 400
Focal Length: 18mm
Exposure Program: Normal
Friday, October 3, 2008
Methods for photo backups
by Ziv Haparnas
Mr. Haparnas writes about science and technology. Ziv Haparnas is an expert technology writer. This article can be published and used as long as the resource box including the backlink is included. Find more on photo printing and photography is on printrates.com - a place about photo printing So you have finally decided to backup those precious photos? There are a few ways to backup photos. In this article we will explain how you can backup your photos either yourself at home or by using an online backup service.
Backing up to a DVD/CD
Backing up to a DVD/CD is done by using a DVD/CD writer and software that can burn files on such media. Usually using such solutions requires more technical know-how. Backing up to a DVD/CD is a cheap solution. You can buy such writer drives and software for under a $100 and each DVD/CD media should cost much less than a dollar. One such software that is used by many is from the company Roxio.When backing up your photos to a DVD/CD please keep the DVD/CD in a safe place a good option would be somewhere out of your home maybe a family member's home, with a neighbor you can trust or with a friend. Another thing to remember with DVD/CD backups is that when you take new photos you should remember to refresh your backups. Usually unless your photo album is very big the easiest way to do that is just to burn again you complete collection.
Backing up to an online backup service
As many other services backup also found its way to the Internet. A number of sites provide backup services today for everything from digital photo albums to your word documents. Those services usually charge a monthly fee in the $10 to $20 but some provide a more limited service for free. The idea behind the service is simple: instead of backing up to a DVD/CD you upload your photos to a site and create copies there. The site stores the backups in a safe place far away from your computer. If a disaster happens and you need your files you can simply download them back from the site or have the site send you a DVD/CD with the files (not all provide the latter option). A broadband connection is needed in order to use this option.
There are many advantages to using an online backup service. First they are usually very easy to use. Some provide software that you download and install on your computer. You point to the folder where your photos reside and the software takes it from there. It will make sure new files are uploaded to the backup service and that the backup is always fresh.
Examples of sites that provide such service are: Streamload that starts with a basic FREE 10GB space (approx 10,000 photos at 2 megapixels) and Xdrive that starts from 5GB for $10 a month.
About the Author
Ziv Haparnas is a technology veteran. This article can be published and used as long as the resource box including the backlink is included. Ziv Haparnas writes about science and technology. More information on digital photo printing and photography is available on printrates.com - a site about photo printing
Disclamer:
The opinions expressed by authors in this blog are their own and in no way represent the opinions of the owner and or administrator of molophoto blog. Molophoto bears no responsibility for any opinion expressed by any contributing author and or article.
Thursday, October 2, 2008
dhow cruise series 1of 2
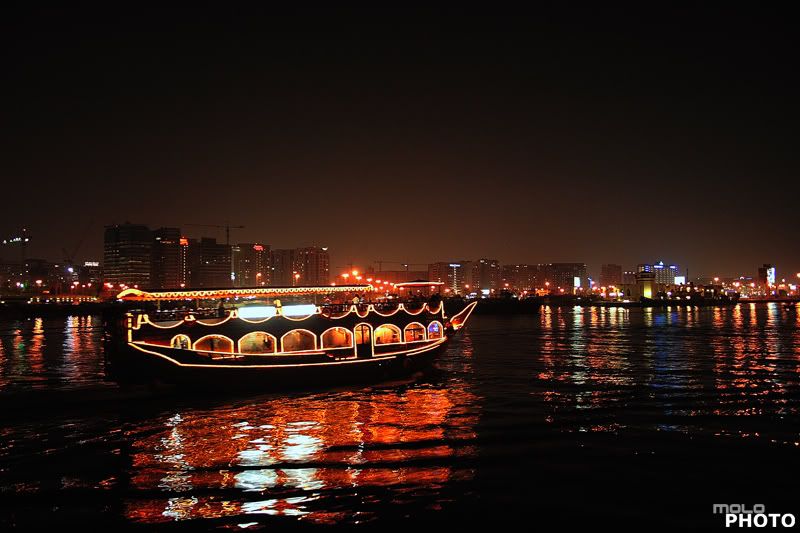 Exif
ExifCamera Model: Canon 400D
Shutter Speed: 1/3 sec.
Lens Aperture: F/3.5
ISO: 400
Focal Length: 18mm
Exposure Program: Normal
Wednesday, October 1, 2008
How to choose a camera with the right number of Mega Pixels?
by Ziv Haparnas
The race for mega pixels has started and there is no way to stop it. Every few months cameras with more pixels hit the market. The manufacturers want you to dump your old camera and buy the newest and greatest one after all aren't 10 mega pixels better than just 8? Apparently the answer is not that simple.
As with many other things when it comes to mega pixels more is not necessarily better. There are many considerations when buying a camera and the number of mega pixels is just one of them. One of the most important things to consider is usage. More mega pixels are good for people who plan to print photos (especially enlargements) or for people who need to zoom in and grab fine details from a big photo. If the main usage of the photos is watching them on your computer screen and maybe printing a few 4X6 prints than 2 mega pixels is more than enough (yes… just 2). Most screen resolutions are 1024X768 so even when viewing the photo in full screen mode you can only view 1024X768 < 1 mega pixels. A 2 mega pixels 4X6 photo print will have a DPI higher than 300 which is more than enough for a good quality print.
If you plan to use your photos for enlargements than a rule of thumb is to be able to print at least 300DPI resolution. The following is a table for different print sizes and the needed mega pixels for such print quality:
page 4X6 2MP
page 5X7 3MP
page 8X10 7MP
page 11X14 14MP
page 16X20 28MP
page 20X30 54MP
Another practical consideration is price and budget: Usually the more mega pixels the more expensive the camera is. Unless your budget is infinite when buying a camera you make a compromise between mega pixels and other features. For example is it better to spend money on more mega pixels or on better lenses? Or maybe instead of getting the latest number of mega pixels get an external flash for low light photography? When buying a camera try to predict what and how you will use it. In many cases a lower mega pixels sensor with better a lens will result in a much better photo than a high mega pixels with an inferior lens. Shop around and make sure that you get the best package in terms of mega pixels and other features.
To conclude when shopping for a camera it is best not to be a victim of the mega pixels race. Although it is generally a good thing to have a high number of pixels there are many other factors that influence the quality of the photos taken and the choice of the right camera for you. Lenses, battery life, light sensitivity, sensor technology used, external flash and many other features are not less important as the number of mega pixels. When shopping for a camera make sure that you consider the whole package and not use the number of mega pixels as a "quality" indicator for your buy.
About the Author
This article can be reprinted as long as the resource box including the backlink is included. Ziv Haparnas is an expert in technology. You can find more information on digital photo printing printing and photography in general on printrates.com - a site dedicated to digital photo printing Mr. Haparnas writes about practical technology and science issues.
Disclamer:
The opinions expressed by authors in this blog are their own and in no way represent the opinions of the owner and or administrator of molophoto blog. Molophoto bears no responsibility for any opinion expressed by any contributing author and or article.
Subscribe to:
Comments (Atom)


